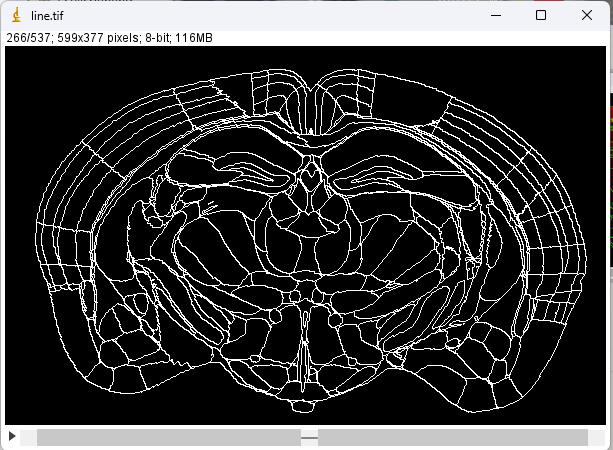
ImageJ常用方法 1 2 3 4 5 6 7 8 9 10 11 12 13 14 15 16 ImagePlus lineImage = NewImage.createByteImage(null , 500 , 300 , 10 , NewImage.FILL_WHITE);ImageStack lineImageStack = PreciseRegistration.lineImage.getImageStack();PreciseRegistration.lineImage.setStack(lineImageStack); lineImage.show(); ImageProcessor imageProcessor = annotationImageStack.getProcessor(120 );ImagePlus myImg = new ImagePlus ("ip2" , imageProcessor);myImg.show(); new FileSaver (PreciseRegistration.lineImage).saveAsTiff(GlobalValue.URL+"/registration/precise/line.tif" );
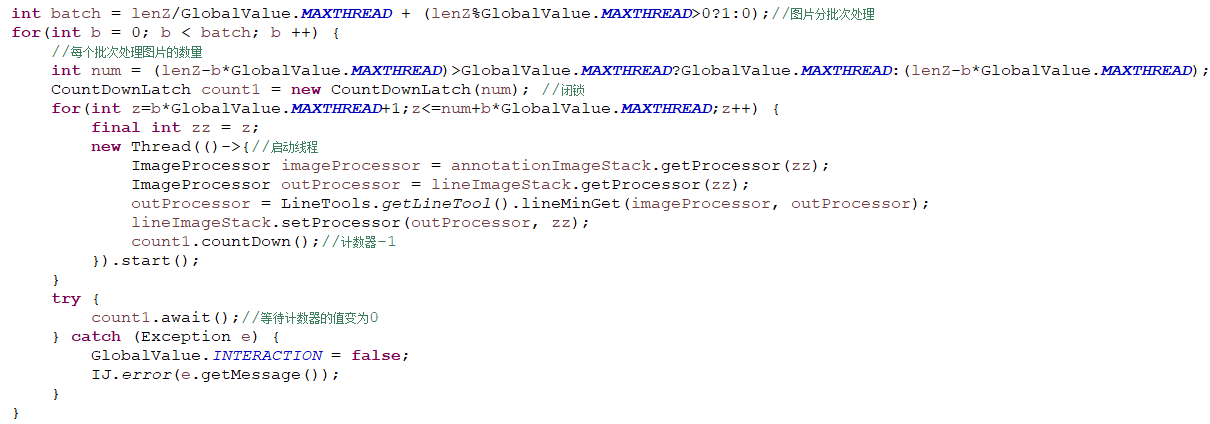
线程 1 2 3 4 5 6 7 8 9 10 11 12 13 14 15 16 17 18 19 20 21 22 23 24 25 26 27 28 29 30 31 32 33 34 35 36 37 38 import java.util.concurrent.CountDownLatch;public class Test03 { public static void main (String[] args) throws InterruptedException { CountDownLatch count = new CountDownLatch (5 ); for (int i = 0 ; i < 5 ; i++) { final int num = i; new Thread (()->{ System.out.println(Thread.currentThread().getName()+" " +(num+1 )); count.countDown(); }).start(); } try { count.await(); } catch (Exception e){ System.out.println(e.getMessage()); } System.out.println(Runtime.getRuntime().availableProcessors()); System.out.println(Thread.currentThread().getName()+" 执行完毕···" ); } }
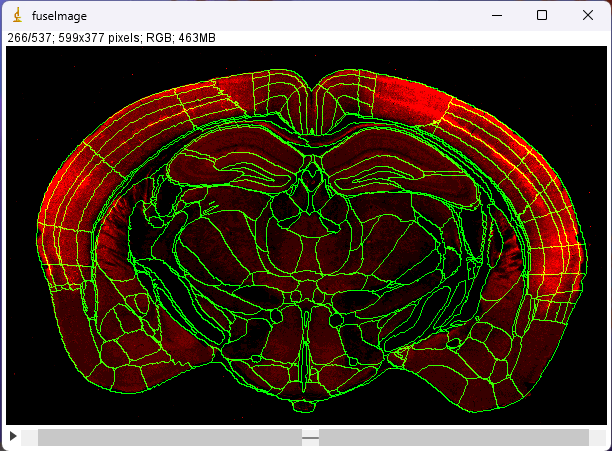
脑片配准 fuseImage 1 2 3 RGBStackMerge rgbStackMerge = new RGBStackMerge ();fuseImageStack = rgbStackMerge.mergeStacks(lenX, lenY, lenZ, downSampleImageStack, lineImageStack, null , true ); PreciseRegistration.getPreciseregistration().fuseImage.setStack(fuseImageStack);
脑区识别
今日总结 昨天看了一整天代码,今天再看这些java和ImageJ的方法就没有那么生疏了,今天还掌握了一个java新技能:多线程!(本科四年一直听说但从未使用过的谜之知识)。昨天研究了半天的ImageProcessor,今天发现BIRDS里很多地方也用到了,不过主要是对stack的处理。昨天发现界面中切换到precise面板时,会弹出配准后的脑片,即使不手动校正,效果已经能达到我的预期了,所以今天就从这个地方入手,希望能找到脑片配准的核心代码。
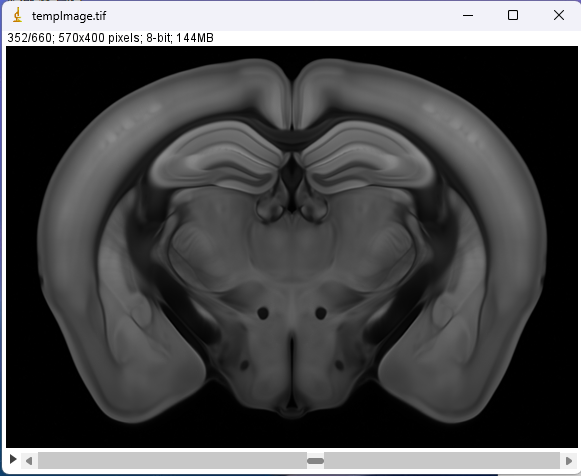
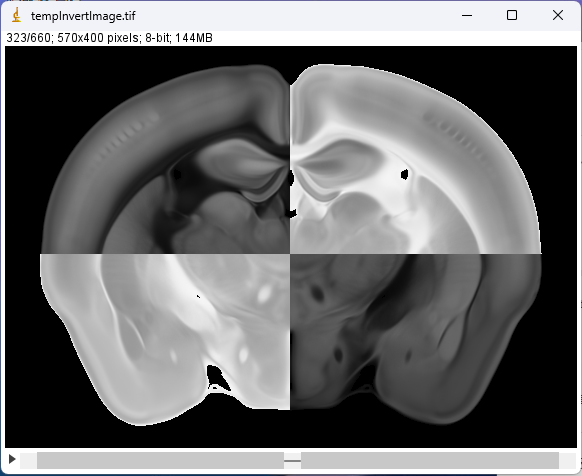
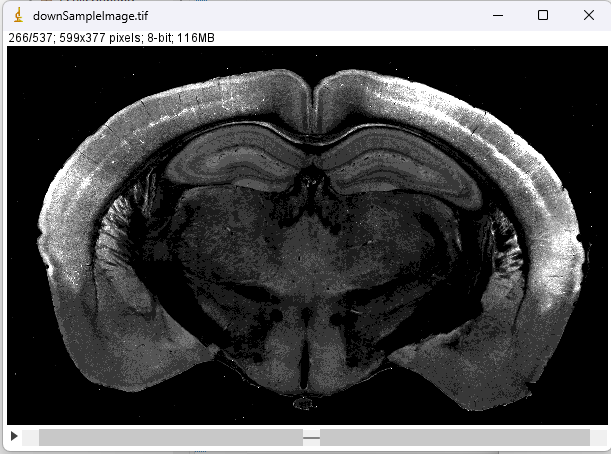
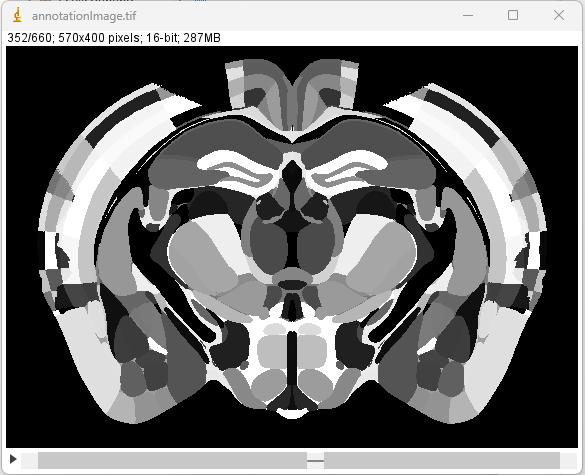
BIRDS中主要涉及了annotationImage、lineImage、fuseImage和downsampleImage这四组图片,脑片配准的效果就是通过合并downsampleImage和lineImage得到的。起初我主要在看脑区的轮廓线是如何得到的,似乎是遍历像素,特定位置赋为白色,但我最开始不懂为什么annotationImage会实现这种效果。后面我发现脑区识别也是获取鼠标位置以后根据像素灰度值与脑区进行匹配(提前存在一个excel文件里面),这些功能的实现都不算复杂,最关键的点就是如何给不同的脑区赋不同的颜色(虽然我还没有找到这部分代码,但大胆猜测是将脑图谱直接灰度化,不过怎么脑区和对应的灰度值是怎么得到的我还没想清楚)。
本以为图像预处理部分不是很重要,但今天的代码看下来,downsample部分是必须要看的,里面就包括我比较关心的annotationImage.tif,coarse部分也会得到一个类似的图像文件,只不过是和脑片配准之后的。明天可以重点看预处理这部分代码,慢慢来。
参考文章